Sunday, December 7, 2014

Monument Photography

Dear Viewers and Fellow Photographers,

Monument photography is the type of photography that catches people out, a lot of the time. It usually turns out something like this: your on holiday, e.g. London, and you get your camera out to take a photo of the grand St Paul's Cathedral, and you imagine it will turn out something like this:

http://www.britainfromabove.org.uk/image/epw005903
St Paul's Cathedral

This photo is exemplar. Grand, centre of attention, nothing blocking it's view, and topping it up, a dramatic blue sky. However, when you put your camera down to observe your photo, its a bit like this:
http://www.geocaching.com/mark/details.aspx?PID=PP2507
BAD St Paul's Cathedral

Undramatic. Not all of the cathedral visible. Almost as if it is a miniature model of the real thing. Its the kind of photo taken from a hotel window or through a tour bus. The sky is dull, and there is dust in front of the building itself giving the photo it's unclean effect.

Monument photography is one where you cannot take good photos without correct conditions. In this case, the photographer claims a windy and rainy overcast whilst taking the photo, and looking at the width of the photo, it was highly zoomed as well. 

All you have to do is take a wide lens along with you, and if you want to get abstract textures, a zoom lens as well. The wide lens, as you may already realise its reason, is simply for the wide grand feelings of the monuments in the picture. The zoom lens is more for times when you can't get into the monument area or when trees are obstructing your view, or even zooming into areas of decoration, such as the top spike or the dome (in this case) of buildings.

Be sure to share and subscribe!

Yours Truly,
Snapography.

Friday, November 28, 2014

Text Photography

Dear Viewers and Fellow Photographers,

Strange a topic as this is, it is very important for day to day life and will come up (if it hasn't already) as a problem to solve. Text photography is not a special type of photography, but it entails a variety of sub parts and areas to look on.

First of all, text photography has a lot to do with the content of the photo than how the photo has been taken and how it looks. The viewer of the photo would be looking for what has been written on the document and therefore, it must be legible the whole way through. Macro setting will help really well in these conditions, and also a slightly high aperture setting for brightening up the picture, and helping it become more legible at the same time. It will also make the photo look professional.

The second sub topic of text photography is more of an abstract take to it rather than the document take. An example of this would be:

http://www.efta.int/sites/default/files/images/content/image-law.jpg

This is the sort of picture you would use on a website or a magazine, which would be using it to give glimpses of the topic, and may be used as a background or backdrop. They can be commercially sold as stock photos as these photos are real sellers over the internet. However simple it may look and seem, you need the correct angle, lens and settings to get it to focus on the right thing. My attempt would be:

My own photo

This is a good photo but not perfect for my needs, as the background. This is because the picture is very dark, and the content of the picture is sparse.

It however, is the perfect picture for how to take a photo - it also depicts well that not only do you need the knowledge of how to take a picture but the understanding of the value of what's in the picture.

The picture had not got a perfect lighting arena, it was taken outside. However, the macro and F point of the photo were spot on, focusing the whole picture and causing a vignetting of the picture.

For documents, on the other hand, you should depend more on your office scanner, but a descent smartphone could do you well.

Yours Truly,
Snapography.

Tuesday, May 13, 2014

Abstract Photography

Dear Viewers and Fellow Photographers,

Abstract Photography is more difficult than normal photography. This statement is debated across the Globe by everyone, and is always wondered on about how it is not a 'real' art, but I would say that is a rather aesthetic way of thinking, an idea more like 'art for art's sake'. I strongly disagree with this as photos and all art has a meaning behind, whether what the viewer's feels whilst reacting to the image, or the importance to the artist which creates it. Many people usually forget that photographers are Artists.

Anyway, looking at Abstract Art you can see the absolutely huge range of what Abstract Art can mean. They usually have no definition, unlike a composition, and also no back meaning, it is simply to arise emotions in the viewer, and in many cases it is not even that. Here is an example of one:

http://thedesignwork.thedesignwork.netdna-cdn.com/wp-content/uploads/2011/08/Creative-Pictures-of-Abstract-Photography-06.jpg
This photo is actually extremely eye catching. It is one of the few photos that actually have not been under heavy editing software to add more 'abstractness' to it. It is clever, the way how the slab of land in the bottom half of the photo seems as if it is a shape, no longer land at all. It is also extremely clever, the way it uses this feature to make the viewer concentrate on what it actually is, and is surprised that something as natural as land can be so confusing. The photo has no meaning whatsoever behind it, and the picture has only made to seem to flick through natural and unnatural due to the editing done to it. A more real life abstract picture would be something like this:
https://blogger.googleusercontent.com/img/b/R29vZ2xl/AVvXsEgCQAtDyDTIRskBxWvF0dLT5L5PXcsPj8ZGgSN0k5nmIBvEx468lgR2sfzyyT1Psd8oCZK3cRxsFW1d9sBmZnDGYk4uQMo40w8hCVRw8yTM62sTK2dwAv91rf-aHRqoG1_MvjohXCODe78/s1600/abstract+photography+ideas.jpg
This photo uses it's colours to define itself outside 'photographic'. The photo makes you want to look at the main object at the top of the photo and actually right into the bulb. The lights look like they are swinging because they seem to be at different angles to each other by the way the photographer has angled his camera. Also what makes this photograph look intresting is how the lights are purple under their own glow and how everything around them is pitch-black.

In Abstract Photography there are two main things, the editting and the object. The editting required to make a picture as normal as it is look so unreallistic is huge, and usually people get others skilled at such things to finish it off for them. Colours are important for this, as you can see in the first example as well as the last example, for the sea and the water and the lights and obviously the background.

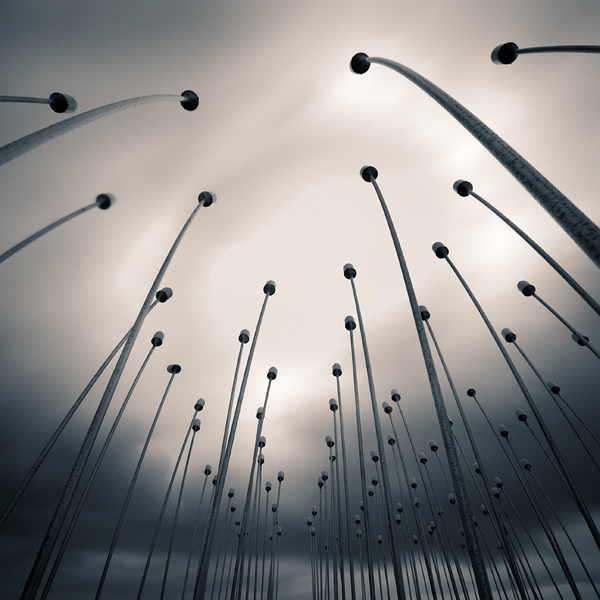
The last style of Abstract Photography is the grayscale ones such as the one below:
http://designyoutrust.com/wp-content/uploads/2012/03/Abstract-Photography-02.jpg
In this photograph you can see the amount of editing done to give the effect of whatever the long things are to seem to light up the clouds. This is a good photograph because of the alteration of the shape of the objects, which to our perspective look straight and identical but sometimes looks as if they are curved, bent or just abnormal. This picture shows to which extent the abnormality of the picture can go to.

Abstract photography goes a long way, pleasing the non-photographer and confusing the common photographer.

Yours Truly,
Snapography.


Monday, May 12, 2014

Garden Photography

Dear Viewers and Fellow Photographers,

Garden Photography is not a simple one-time topic. It consists of many areas, for example some sorts of Weddings or celebrations to the flowers. The Garden is an area full of photographic success for many reasons:
http://www.glamourandgraceblog.com/wp-content/uploads/2012/10/garden-bridal-shoot-Just-For-You-Photography_01.jpg
http://www.finegardening.com/CMS/uploadedimages/Images/Gardening/Issues_101-110/041101836_garden_photography_ld.jpg
The Garden, normally is an area full of colours and themes. You can add a huge amount of detail to the photos such as field of view to give it an extremely amazing effect. In the first picture you can see how the background gives the overall picture a somewhat 'beautiful' effect. The picture has a natural beauty effect which nowadays is not really available to lots of us.

In order to get such a great effect from your photos, you have to remember to have your subject of the photo in line with the background of the whole composition. Also you have to remind yourself how much effect the background has on the entire photo, and try to introduce different colours, and also try not to have a skyline or a definate outline to it, this enables the photo to keep it's wonder and heaven-like feature. Also, if you have more time to take the photo, try to keep colours in the background contrasting from your second object, in this case the flowers, and if you can, you might even make it the same colour as the first object in your photo. This combines the whole photo together.

This links into the use of flowers in your photos, this is well represented by this photo:
My own photo
This is a photo taken in Italy, near the Bay of Naples. It is from a famous tree type found in Italy, nicknamed 'The Blood Red' tree in Latin, due to a fable how Satan was hung on the tree and the tree had absorbed the blood leading to the colour of it. You can see the photo has a blurred out background and you can see the importance a background can give to a photo.

There are many examples of this on the internet which can inspire you to keep the background vivid in Garden Photography.

Yours Truly,
Snapography.

Sunday, May 11, 2014

Aquarium Photography


Dear Viewers and Fellow Photographers,

Aquarium Photography is hard. Normally, the photo turns out to be blue and even discoloured, and leaves the untrained photographer wondering why the camera cannot capture what the human eye sees, and aquariums are the perfect example of this:

This is not a very 'fabulous' photograph, lets just say. The photo has no clear object, which is meant to be the shark but it really isn't visible, the angle of the photo doesn't give it a sea-like effect, it's blurred and "its all blue". There are many, many  visible problems with this photo.

http://ilmadventures.files.wordpress.com/2013/07/big-shark.jpg
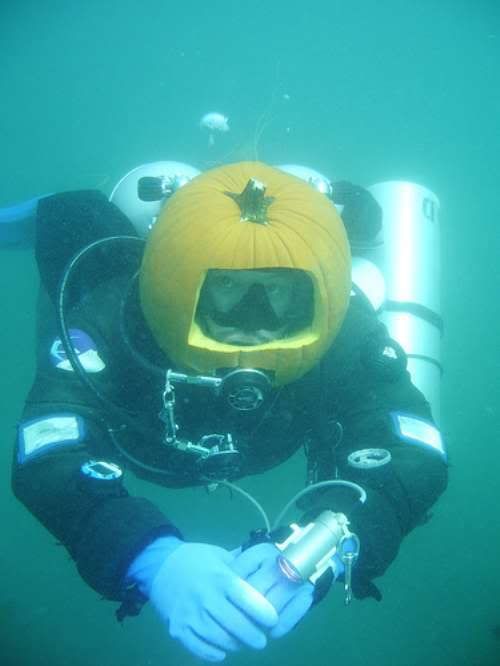
Lets start torubleshooting, if your photos turn out like this when you go to the aquarium then its not quite worth keeping them. The first problem with this photo is with the object. In order to get a good photograph in the low light situation, keep your aperture high as well as the shutter speed. This will minimise the blurred effect on the photograph, while still letting light into the camera. If you sort out the problems with the object in the photo, it might turn out like this:
http://www.thesaltybox.com/News/3088-Sea-Life-London-Underwater-Pumpkin-Competition.html
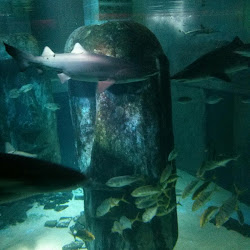
This photo has a clear object, and has lost some of the dark bluish effect which is good. Now to remove the dirty blue you have to unsaturate the image, possible on some versions of digital cameras but not very effective, so what you have to do is probably edit it on any software on your computer, Picasa will be able to do the job. If you are able to do this successfully, your image may look more like this:
https://lh3.googleusercontent.com/-vnZaWjSNVDA/UVi0CX6N3nI/AAAAAAAAAhw/zCLgujcB6xQ/s250-c-k-no/2013-03-31
The object is now clear, the water is not coming into the way of it, but the image has 'vignetted'. To solve this sort of problem, (if you get it) is to add a blue 'lighting setting' on your camera. This will undo this to a certain extent, and will also remove any remaining 'blueness' to the image. It should turn out slightly like this:
http://1.bp.blogspot.com/-R0AeMgLX9Dg/UBqZ906HUcI/AAAAAAAABOw/k4SMLPCo-mA/s1600/Sea+Life+London+075.JPG
The photo is finally visible, unblurred and clean. If you gave a DSLR, you can put on a macro lens and take photos like this:
http://imagene.youropi.com/london-aquarium-activiteit-londen-1(p:activity,6793)(c:0).jpg
Your Truly, 
Snapography.


Tuesday, February 25, 2014

An introduction to Camera Settings 2

Dear Viewers and Fellow Photographers,

This post is the second post to the An introduction of Camera Settings 1.


http://www.publicdomainpictures.net/view-image.php?image=3244&picture=camera-setting

The picture above is a photo of a normal settings dial on a camera. 

The preset 'Sports' mode is a very useful preset for fast moving subjects, and on some optical cameras is the option for 'Burst' mode. The preset sets the ISO high to capture moving objects sharp, (not blurred) and the shutter speed is also extremely fast. This preset is very useful, and is the third most used preset (after Auto and Macro). The Aperture changes according to what the camera detects, as lots of people use sports mode for many different reasons- one being they cannot hold their camera straight enough and so their photos always turn out to be 'jogged' or blurred.

The next preset is the Backlight option. In this image you cannot see clearly enough the symbol as it is different to many others, which have a tree in front of a sun. This mode increases the aperture by a significant value meaning that the photo is visible and is not just a plain silhouette. The photo however can lack sharpness and the normally low shutter speed doesn't help the situation. This preset is probably the least used preset, and this is probably because there are only a few occasions when people take a photo of something when the object is in the shadow (unless they are trying to achieve a desired effect).

The next preset, which is not shown on the dial in the picture above, is available on most cameras. This preset is extremely hard to use for some, however for the more experienced photographer, it is slightly easier. This mode enables you to take photos in the night, when there are low-light conditions and when the camera's Auto setting cannot cover (this might vary for some models - there is an Auto-Scenery options in some cameras which detects it is night time so it switches to it. This feature can be better on some cameras than others.) The preset changes the shutter speed to extremely slow and tries to keep the Focal Length as large as it can. This means that you can only successfully use this preset when you are using a tripod, not matter how steady hands you have. Some readers might already have experienced the flurry of wild colours when they were trying to take a night shot.

These are the rest of the Presets that come inbuilt to a classic digital Camera. The next post will be on the Manual setting modes.

Yours Truly,
Snapography

Friday, February 7, 2014

An introduction to Camera Settings 1

Dear Viewers and Fellow Photographers,

There is a lot of mathematics adjoined to the world of photography, and if people don't understand it, they remain constrained behind their camera's Auto setting, and many don't even experiment with it as they worry that they might end up changing their camera's settings so it 'breaks'. This never happens, as if you manually changed a setting, there is always a way to change it back.
http://www.publicdomainpictures.net/view-image.php?image=3244&picture=camera-setting

On the camera dial (shown in the picture above) you can see how it is split into two sections. The bottom half (including the green rectangle) are presets, options quickly accessible by the confident and also the not so confident. The green square is the Auto mode, a mode in which most people choose to shoot with - the camera is equipped with technology to detect the surrounding and find out about how much of Aperture and Shutter Speed will make the picture look 'good'. I say good because this technology varies to how good it can be on each camera.

On the presets, you can see the first one down is the 'Portrait' option with the Woman's face on it. The camera will have preset settings (which may or may not be flexible) which tell it to keep the aperture high, a short focal length and slow shutter speed. These are the sort of conditions you find when you are taking a portrait - you are close to the face so the light can be low, the face is close to the lens so the focal length is also low and the camera should not be moving because the people may be posing for the picture. This sort of setting can be flexible on some aspects like the shutter speed and aperture, but are around this area. In auto mode, the camera can only know if it is a portrait picture if the camera detects a face - this normally does not happen.

The next preset is the landscape option. This is indicated with mountains and a cloud on it, and the normal settings the camera will have is probably large focal length, low shutter speed and small aperture. This is most probably because usually when taking photos of a landscape, the object of capture is usually very far and large, and so the large focal length will allow it to keep distant objects in focus and the whole of the photo in focus. The shutter speed is low as in a landscape photo usually nothing is moving fast enough to blur the image, and the longer the shutter speed the better quality of the objects will appear. Aperture is low because in landscape photography there is a lot of natural light to brighten the picture.

The last preset for this post is the Macro photography option. This is usually represented with three petals and two leafs for the flower. The Macro option is usually very flexible, as it might be used for quite a lot of things, outside or inside. The shutter speed is low/medium, the aperture is low and the focal length is at it's bare minimum (except if there is a Super Macro option). The 'bare minimum' focal length depends on the type of camera and it's specifications, something to look out for when buying the camera (the more the range of the Focal Length the better). The shutter speed is set low/medium because when taking close up photo shots there is not a lot of movement, the aperture is low (but very flexible) because there is [usually] a lot of natural light.

Explanations for the other presets and Manual Modes will follow very soon - keep checking so you don't miss it

Yours Truly,
Snapography.

Tuesday, February 4, 2014

The Science behind Photography

Dear Viewers and Fellow Photographers,

To be able to use your camera well, you need to understand how it works. There is a lot more than just picking any camera up and clicking a photo, as you need to understand the typical scientific bits to actually be able to successfully take brilliant photos. Photographers who don't know what their camera is all about don't do very well in taking photos.

Let's start with the lens. (To see details on how the camera zooms, check out the last post Digital Zooming vs. Optical Zooming)

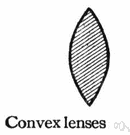
A lens in a camera is a curved clear glass. This glass is called convex because it is wider in the middle:
http://www.thefreedictionary.com/convex+lens

A simple science phenomenon takes place in a curved glass, refraction. Light rays change direction when they are hitting a more dense or less dense material (in this case more dense - glass). The glass above is biconvex, meaning the ray are converging, so therefore there is a point when the rays of light meet. This point varies from how strong the lens is, but gives you an idea for how the camera 'autofocus' or why if you move the focus ring you only get a sharp image on one single setting:
                                                         
http://photographyguide99.blogspot.co.uk/2012/11/how-lens-works.html
So that's how a Camera focuses. The next thing to find out about how digital cameras make a photo from just light rays. The Camera has a magnetic film called a sensor fitted onto it. Every area of this sensor picks up a block of colour which it translates into a single pixel. This involves precision, so that too much light does not leak in or too little, so the shutter 'blinks', letting in a required amount. This can be altered for different things you are taking a photo of, such as a picture outside of a mountain or a picture inside a low-light party, and is called the shutter speed. Also, you can control the amount of light coming through; this is called Aperture. Both these options are very useful for photographers working outside the 'Auto' mode:                       
http://photographycourse.net/exposure-control

The image above is a literal drawing of what happens to the light rays. The upside down picture is flipped automatically by cameras. This explains how the camera can get receive a photo, and how the photographer has total control over it.

You must now have a little clue for how your camera works. Any other burning questions you want to ask, please feel free to comment, and I will reply promptly.

Yours Truly,
Snapography.

Monday, February 3, 2014

Digital Zoom vs. Optical Zoom

Dear Viewers and Fellow Photographers,

Zooming is sometimes a very difficult topic to get the hang around. Zooming comes in two different formats, digital and optical. In most cameras, optical zooming is available as well as digital.

You may have seen the words 'X times Optical Zoom', sometimes it is even written onto the lens. The difference between 'Digital' and 'Optical' zooming is when you zoom digitally, your camera is automatically magnifying the image, so it takes a normal picture and then essentially crops it. The image is not clear normally, and I don't recommend you take any photo with this feature enabled. The image quality is extremely bad, and most of the time you can't see the object you are trying to capture. I have never taken a completely clear photo with this function, and it is most probably impossible.

Optical zooming is much different. You can guess by the name what it does; it moves the lenses inside the camera to enlarge the photograph (hence Optical). This means the image quality doesn't decrease. However, many people are fooled by the fact that optical zooming makes the image less clear. It doesn't. The camera sometimes is not made to take photos at that amount of zoom, making it extremely hard for it to focus. This only happens to digital cameras and lenses which are retractable, and cannot be removed. Also, basic problems like movement can blur the image.
http://filmmakeriq.com/lessons/digging-deeper-into-the-dolly-zoom/

In the image above, you can see how the refraction of light rays can enlarge an image. In the paragraph above when I explained how the camera cannot cope with the amount of zoom it has been forced onto it, when the image is too large the sensor is not big enough to cope with the large image being projected on it. 

When you have a camera which has a detachable lens, each lens is made for its job; Macro, Wide-Angle and Telephoto (these are just the main three). The Telephoto lens is specifically made for zooming in, and it can focus well. 

Yours Truly,
Snapography.

Sunday, December 29, 2013

Macro Photography

Dear Viewers and Fellow Photographers,

There are a lot of photos on the internet featuring close ups of plants and flowers, with the label "macro". However, macro photography is not as easy as just taking a photo with the correct focus.

Macro photography can take place in many places, not just plants or insects. For example, the if you want to take a portrait, you may use a macro lens or take it in macro mode, because that will mean that the photo will be clearer and will focus on only the face. Also, macro photography is an excellent alternative to zooming into the little details, because when you take photographs at that range then you can crop out details later, because zooming in can be a little tricky, for example the camera then experiences a lot of movement and the image blurs, or the image quality decreases and other problems like so.

Some examples of macro photography I found on the internet which inspired me quite a lot are shown below:


  Nature Insects Macro Ladybirds wallpapers
 
Blue Berry Macro Wallpaper 1080p Wallpaper


The thing that makes macro photography special and appealing is that it shows the detail of life around us we just don't notice. This is because the focus and clarity the photo goes into is one that a naked eye cannot see. It also gives us a sense of scale for how detailed our universe is.
 
What the key is to taking macro photos like the ones above is not simply the equipment. It takes immense skill to get the right focus for such objects, and it all comes down to what you want the photo to be. The last photo, the one with the eyes of the picture, show the exceptionally well. The photographer has carefully chosen the thing he wanted to photograph, in this case it was the drops on the insect's eyes.

For taking macro photography with such detail takes time to take and set up also. Taking these types of photos seem like just going round, finding a detailed object, focus, click, and finish, however many people find it very difficult to get the best snapshot of that time, especially when they are taking pictures of moving things like pets, insects, etc.

One thing I have noticed when taking photos of close up things is it is easier to auto-focus when you are zoomed in. For example, reckon there was a flower I wanted to take a photo of, then first of all I would get up close to it, if it doesn't auto-focus and I was feeling lazy, then I would take a step back and zoom in then try to focus into the flower again. This works most of the time for me, however most of the time I would just swap my lens.
Note: This Technique only works with the manual zoom lens, so if you have a digital camera, you cannot use this method.

This is the basics of Macro photography, however, there will be more on this topic later.

Yours Truly,
Snapography. 
 

Saturday, December 28, 2013

The Common Camera Types - Good or Bad?


Dear Viewers and Fellow Photographers,

We all know the disappointing feeling victims worldwide get when they buy any camera which they are not pleased with and don't do what they want it to. I am unable to list all the cameras I recommend, or even, I don't recommend, but it is a good thing to be aware. This selection of cameras are ones which can be good and bad.

The type of camera shown above is highly unrecommended if you want to do real photography. Cameras which are the worst of their range can have worse image quality than phones like the HTC One. In fact, not all of these types of cameras are useless; if you get well known companies such as Nikon or Canon, go to the most expensive camera of this sort, and (almost certainly it will be too expensive) cancel out from up there the features you don't need. These types of cameras don't work well at night as their flash makes the picture Over Exposed and are only suitable for still day trips where there is a lot of natural light. Indoors or at night, movement at any setting on these cameras don't work.
Also, companies like FujiFilm have a lot of quality range in their equipment. You can get really bad cameras for a relatively high price if you don't look carefully. Recommended items from FujiFilm are things like half-SLR, half-digital cameras called CSCs. The new X-10 is a good addition, however there is an issue with a white disc appearing on the viewfinder/screen. Make sure you research properly reviews of customers which have previously used the camera you want, and don't rush choices.

http://attach.forum.ge/post-58-1368199538.jpg

The next type of camera is the misleading digital camera which looks like one which could be used as a professional camera. Usually, if you buy a camera of this sort for a high price then you will get a camera with high mega pixels and good daylight landscape photography and you could end up with almost brilliant macro photos in natural light. This type of camera is highly unrecommended if you are searching for a good low light camera, and one that lets you take extremely imaginative photos. Also, in this camera you get a lot of noise in the picture, which makes your photo look digitised and very unnatural. I have this sort of camera, a FujiFilm, and it was a great camera for taking close ups in the daylight, however not perfect for indoor parties etc.

http://www.dcresource.com/sites/default/files/imagecache/gallery_large/reviews/sony-alpha-nex-7/camera-front-angled.jpg

The camera I was talking about a few sentences back, the CSC's, are for people who want a small, but professional camera. These cameras are sometimes called Mirrorless Cameras and are all rounders. It is great for experimental photography but don't have the perfect feel of a SLR. A CSC could be very good, however some of them are not the best. The best ranges for these sorts of cameras are the expensive Sony Alpha, FujiFilm X, Lumix G and Olympus OM-D. If you buy any sort of these type of cameras they would usually be good, but don't take any chances. The rapidly rising Samsung NX series have had some doubts put up, but in fact they are pretty good. These cameras have a high megapixel count, which means they have a bigger sensor. Also, you can buy different lenses, which means the lens can be taken off just like SLRs, however the only draw back is that the series has there only special lens range which can be pretty small, but for good photography, it is enough. Also you can order a special lens you wish to have by good lens makers in the market, but this is extremely expensive.
These are the most common type of Cameras, and I hope you have got a feel for what they each are like, their positives and negatives and what camera would suit what occasion.

Yours truly,
Snapography.

Tuesday, December 10, 2013

Object Positioning

Dear Viewers and Fellow Photographers,

Object Positioning. It is a concept many common people are aware of, and it is pretty self explanatory however it is a skill that many photographers are born with. However, if you weren't born with it, don't worry about it... you have probably already mastered the skill. The main places you can position the objects are as follows:


(P.S: All the photos used on this Blog are produced by me, unless a link is displayed below)

The red crosses shown above are positions where the object is usually placed and focused when taking a photo. These are just some of the usual ones, however there can be other ones, like this:


You can see the yellow crosses as where you could place the object you are trying to capture, or if you are trying to capture a background, then use a higher F-Point and use one of the yellow crosses to focus on it too.

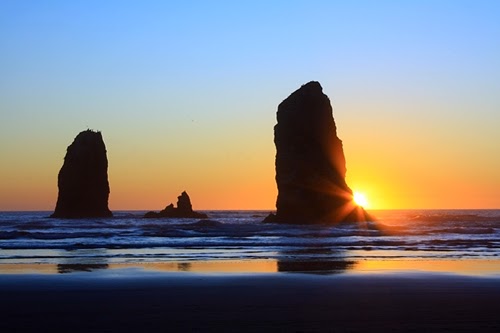
Object Positioning is a very useful and a very basic technique used for good photographs. You can use this techniques to arise many emotions if you use lighting; you can use shadows and make the object on the left of the photograph and this will mean long shadows can be created on the other side. Also, you can use the sun to create a very dramatic effect:


The picture above has been taken by a skilled photographer. Observe the photo carefully, and then you arouse many different feelings in you, a very touching shot. The main object in this photo are the rock stumps, I guess at Lands End in Cornwall, UK. The larger rock, the absolute focus of the picture, shades the sun half way, creating lovely, sharp rays of natural light, which goes perfectly well with the soft rays next to it.

Object Positioning is a very useful technique that you can use whenever, and although you use it almost every time you take a photo, to know the details and why it is works well.

Yours truly,
Snapography.

Monday, December 9, 2013

Photography.

Dear Viewers and Fellow Photographers,

I welcome you to the world of photography. Photography is an interesting idea and approach of an art which accepts natural wonders and abstract features. On the blog, I will be discussing tricks and ideas over Photography.

Photography - A concept...

Photography is a way of communicating to the wider world be sharing a slice of time at one particular angle. It is very renowned amongst creative minds, especially young ones trying to express there feelings and emotions, usually because no one will take them seriously (I have had experience). So, young or old, photography is a deep and compelling thing. Like art, none the different, and very effectual. Photography is a great thing, however it is sad to know that people forget how to enjoy the hobby of taking a frame out of the whole scene, in an astonishing way with to communicate with the rest of the people.

Cameras, Equipment

Cameras are usually very important. There are some I would certainly not recommend, and some I will, for the respective person. I have had a lot experience with some great pieces of technology by some incredible companies, and I think that to take great photos, you do not necessarily have to have the best camera out there. Although, some equipment may limit your creative range and will just not let you capture exactly what you see through your own eyes.

Does it help?

Well, once we take a photo for the first time, you think, 'Wow, lets try another'. But then you grow more mature and get bombarded by ideas of getting a good education and managing time well, and then you drop all the time taking material, which include your hobbies and, life is miserable. However, if you love the topic of photography you could have a healthy living out of being a professional photographer. You could also look into careers of media, which you are almost most likely to enjoy as a subject. And yes, as a human, everybody needs a way to keep their minds alive and vivid by some imagination.

Yours truly,
Snapography.